Europa XS – The story of recovering a poor abandoned Europa part 3 (She flies)

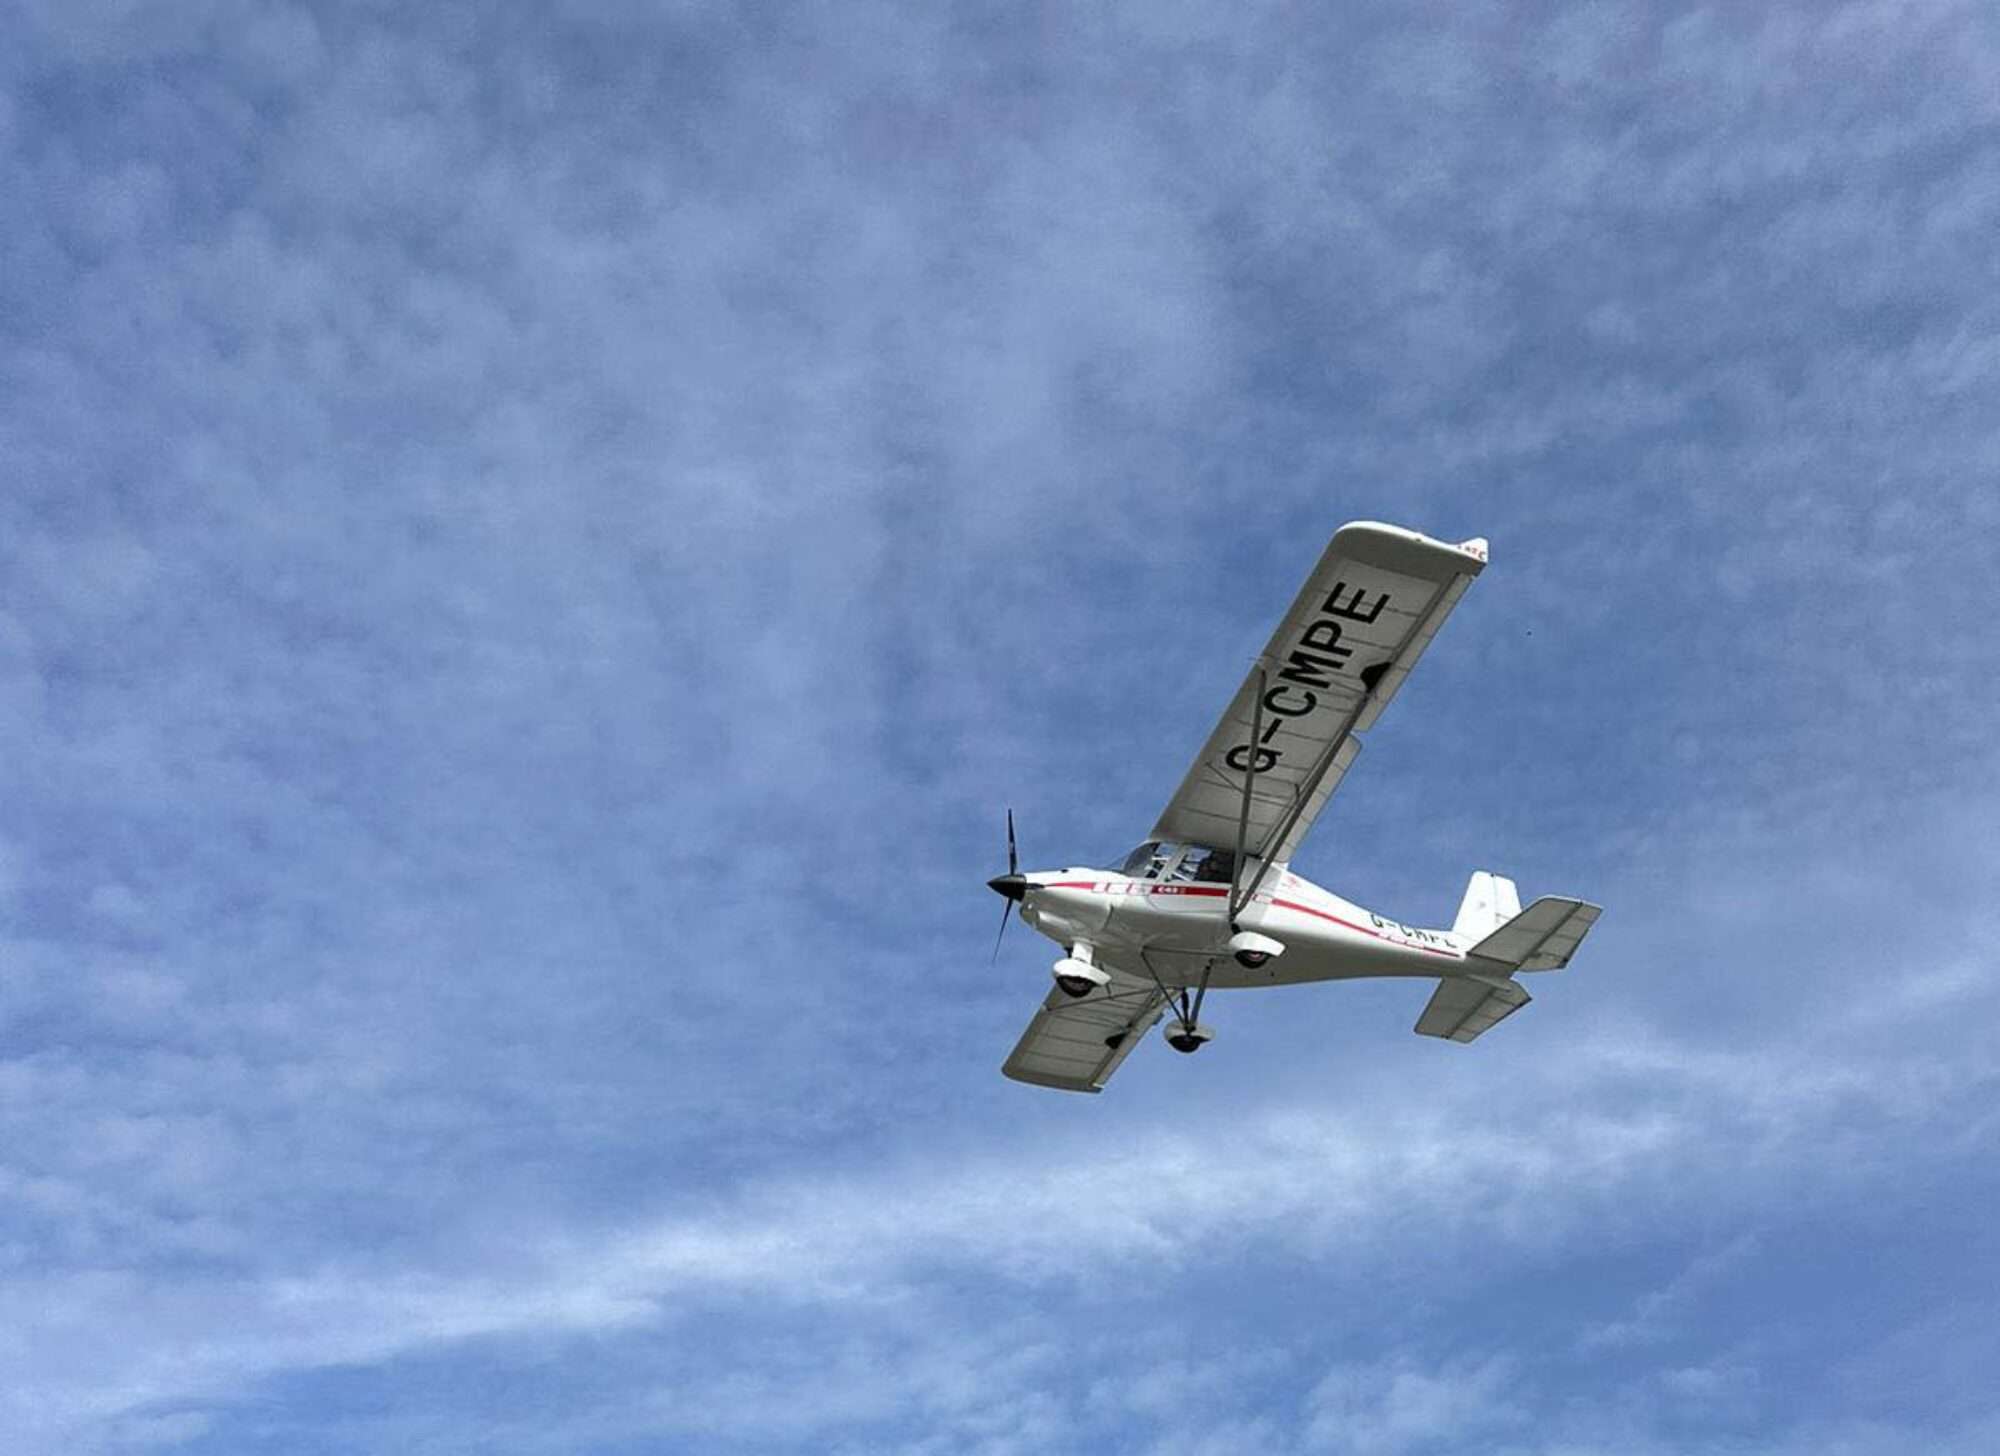
Our Europa, she flies!

The wings were on and all we need to do was to weigh her and test-fly her “simples”! Andy was a little delayed due to flying over and not being able to get his aeroplane out of Turweston. I was watching out for him to arrive but missed him, he had landed and taxied up in a Eurostar before I spotted him.

Finding the datum in a Europa Tri Hi-Top was our first challenge, once we established this we levelled the aircraft using packing and established the centre line and the datums for the measuring of the C of G. Next we pulled her back up on the scales for the weighing. The surprising thing to me was that despite changing the battery for LiFePo4 and saving approximately 6Kg she weighed almost the same as she did at her last weighing, some 10 years ago! 


We needed to double sign the logbooks for the disturbed control surfaces, rudder and elevators that we had repaired and then we refitted. Even though this was taking longer then we expected all was progressing well. So we fuelled her back up and pushed her out before Andy did one last walk around before taking to the cockpit.

Flaps extended to take off settings and then the EFIS was switched on and… nothing! no lights no the EFIS. I went over to see what was up. The voltmeter was not reading any volts. It must be the new LiFePo4 battery! We had installed the new battery and done the 5 hot starts needed as well as operated the flaps and elevators a few times. The inbuilt battery management system had shut the battery off to protect against total discharge. 

Luckily the old battery was on hand and within the limits to refit for the test flight. We assume the new battery only had a holding charge and should have been charged before the test, or at least after it!

The old battery installed, she started on the button, this delay gave Simon time to arrive and witness the first take-off.

https://vimeo.com/422570332https://vimeo.com/422570463


We have an airworthy aircraft, we now need to get our type conversion for the constant speed propeller and we will be off!

Thumbs up!

Europa XS – The story of recovering a poor abandoned Europa part 2

We left the story with our elevators and rudder sadly in the Europa factory shut due to Covid19. Since then the factor has partially reopened and our parts repaired and collected. Refitting them was straight forward (unlike the wings!). Although the engine started and ran well, as it had been stood for such a long time we decided to have a 200hr service and a check done, although we could have done this ourselves we decided to have a professional in. We use Gary Masters of Airmasters for our C42 Rotax so it made sense to have him look over the Europa’s 912ULS engine, even though his travel costs significantly added to the overall costs. Prior to his arrival we drained the fuel and replaced with fresh mogas (ordinary unleaded fuel to you and me).

Gary arrived on a sunny day in May and remarked on the fact that the Europa was one of the better examples he had seen. He advised having the pipes changed, but added that they looked OK, but were of unknown age, we declined this at this time, but will do it ourselves in the near future. He also said that the mechanical fuel pump should be changed as it was over 5 years old, this we agreed with and he duly changed it. The oil was very clean as was the filter, cylinder compression was near perfect, next he checked the gascolators these too were in good order. service completed time to start the engine!

Gascolator

The engine started first time and ran smoothly, the oil temperature didn’t increase, this was put down to the cold day and no cowlings, however we later found the oil sender lead off!

Engine serviced we tried to refit the wings but could not line them up with just two of us as neither had done this before, we decided to leave the refitting until the LAA inspector and Europa expert Andy Draper visits to do the permit inspection and to teach us a bit about the Europa. Andy used to work at Europa and is seen to be one the experts on them, we would be in safe hands.

On the day of the inspection, a number of minor things were found and we were able to fix these as they were pointed out. All was progressing well until we got to the point of refitting the wings! we were missing a rigging aid, but this was not essential.  With both wings on we could not get the port wing retention pip pin in, no matter how we tried and how we tried! The wings were removed and the problem examined. The rigging cup on the port wing had fallen off previously and we glued this back in place using Araldite 420 as advised. The rigging cup could only fit in one place as it sat in a fibreglass seat. Unbeknown to us the cup was about 0.5mm out of alignment and with both wings aligned this was enough to stop the pin going through.

This was adjusted the following day and the wing refitted, after a period of jiggling the wings the pin went in, it was still tight but we got it in!

The wings were finally back on and our Europa looks like an aeroplane once more.

Andy is due back to complete the inspection and to test fly her for the permit in the near future, I will update you all on how it goes.

to be continued…

Europa XS – The story of recovering a poor abandoned Europa part 1

Europa S

The drive home

A while ago myself and some friends decided to buy a GA aircraft, the criteria we set was a low wing, affordable (subjective, I know), Rotax powered aircraft. This effectively inferred a 2 seater, kit build, LAA registered aircraft. After we looked through the normal sites afors.co.uk, PlaneCheck.com, etc we concluded that a Europa fitted our requirement and we focused on trying to find an affordable Europa, it helps that the Europa Aircraft company is also only a short drive from where we live.

As luck would have it a hangar became available central to where we all live so we put our names down for the hangar and started the search for a Europa. This was somewhat frustrating as we had seen a few for sale before actively looking, but not many since. There was a Europa that had been listed for a while, but had not sold, so two of us made the 4 hour drive to view it. We quickly realised why she was still for sale as we looked around her. The current owner had made several modifications and not had them signed off, and although he seemed a nice guy, he was less than sold on the need to do so. The aircraft was on its third different engine type and bore the scars of the frequent changes in the form of holes in the bulkhead; fibreglass had been mounded high in placed to “add strength” the owner told us, It was a clear no from both of us.

I was sat at home the following evening feeling dejected at not being the proud owner of a Europa tri gear (we had ruled out the monowheel nicked named “the widow maker” even though to my knowledge it never has made anyone a widow, but it can be difficult to handle on the ground!), when I decided to try and locate a Europa XS tri gear near us so we could go and look at one, talk to the owner and maybe, just maybe, cadge a flight in it! The only source of such information is Ginfo, I manage to identify 2 in the first page or so of results and then on the next page was one that caught my eye, it was listed as owned by Mr xxxxx for the estate of zzzzz. This sounded like and aircraft in probate! I Googled the owner, he was indeed dead, I Googled the other name and he was a solicitor, was this a tri gear? it was a tri gear, it was an XS and it had the wide and high mods too. First thing in the morning I call the solicitor, who was on holiday and referred me to another member of his practice. I called her and arranged to view the aircraft which at the time was at Popham airfield, within 2 days three of the group were on site looking at the Europa.

First impressions of the Europa XS

Europa S

We arrived at Popham airfield and waited in the clubhouse for the airfield manage to show us the aircraft. As he walked us over we were given a brief history. There looking somewhat sad in the corner of a field was the Europa XS that we had come to view. No keys were available, but the cockpit was unlocked on one side, so we climbed in and had a good look, one of the first things that struck us was how much more room there was compared to the Europa Classic we had viewed. The aircraft has not been flown or started in around 18 months, there was some mould on the stick gator, the rudder had been damaged assumably from a gust of wind causing it to hit the elevator, one elevator had delaminated on its trailing edge due to having been hit down on to a pole and both elevators had a mound of fibreglass near the release pins. overall she looked like a nice aircraft, the paintwork was bright, where there was no mould the interior was watertight and clean, still it would be a big gamble as we could not start the engine! We took the cowling off and burped the engine successfully the oil looked clean and free from water. On the drive home, there was much debate about the risk of buying an out of permit aircraft, especially one that had not even been started in 18 months, but we decided we would put an offer in that reflected this. We waited to see if we were successful or not, as we knew there were at least 2 other bids! After around a week we heard from the solicitor that our bid had been successful. 

The recovery  

Stripped

Loading
Still towing the Europa

We pick the first day that snowed in 2020 to go and bring her home, just our luck. Two set off for Popham and two set off to pick up the trailer. Simon and I arrived at Popham and started to remove the wings and the elevators ready for transportation. The guys with the trailed turned up, after taking a slight detour en route, and we loaded the Europa up and then started the long journey home. Our new home airfield was closed by the time we arrived, I think its fair to say we got some odd looks from the drives of the few cars that came around the corner to find a man waving a red flashing light and an aeroplane parked in the middle of the road!  We finally got the gates opened and pulled in and unloaded our Europa, she was safely stored out of the wind at the back in a dry hanger behind a Cessna 172 and a Piper Super Cub.

A few days later our faith in our purchases was validated by the engine starting first time after being stood for so long, the avionics sprung to life too, we had not wasted our money, a great feeling of relief was felt as she sprung into life!

Currently, we are all in lockdown and this has delayed the repairs to the rudder and elevators which sit in an empty Europa factory awaiting repair and the wings sadly remain detached too.

To be continued…

Radio interference can come in many forms, this is the story of two sources and how we fixed them.

Ferrite Choke

Recently our group fitted a Pilotaware with external antennas and at the same time we had the elevators and rudder re-skinned. Is the re-skinning unrelated, possible!

Sometime ago an LED strobe from Smooth aviation was fitted to replace the dead bottle flash and we had no noise from it. However, one of our group had reported intermittently hearing noise that seemed in sync with the strobe flashes. Smooth recommended cabling strobes is shielded Tefzel or similar. We fitted the LED strobe to the existing twin core flat cable (not shielded or twisted).

The aircraft also had an issue many C42A’s have,  in that when the PTT is pushed the trim indicator and the fuel gauge read erratically.

The buck converter used to power the Pilotaware was the second source of interference. This was the same type used for the GPS which had a low RFI (Radio Frequency Interference) footprint, however we are driving this one at around 50% of its capability and it was wiping out the intercom as soon as it was switched on.

So how did we go about isolating the source and fixing them?

First the strobe, the strobe noise was thought to be due to having moved the trim wire when we refitted the elevators and when we moved the strobe wire the noise would reduce and intermittently disappear. Thus, I deduced it was RF pick up issue and I moved the wire until we had continuous noise. Then I tried fitting a Ferrite choke at the strobe, this instantly cleared the noise, however the choke would not fit inside the vertical stabiliser. I tried fitting the choke in the fuselage between the last antenna and the tail, clamping it around the strobe cable, again instant silence on the intercom! To stop the choke moving I placed a cable tie either side and another around its body to act as a backup to the inbuilt clips.

Fitting this choke had the additional effect of removing the noise causing the trim indicator and fuel gauge being erratic while the PTT is pressed, the cable was acting as a pickup for any RFI

Ferrite Choke
Ferrite Choke

Eradicating the second source of interference

I then turned my attention to the Pilotaware buck converter, these are often noisy, but this one had proven to be OK in a low current operation, so I was not expecting this issue! Adding the choke was not expected to work on this noise source and it didn’t. I also tried creating a Faraday’s cage around it using tin foil, this worked to some degree, but was unreliable. Buck converters are notoriously noisy devices and the normally accepted way or silencing them is to fit an LC filter on the input (not the output) side. These are often fitted in radio control models to quieten down the ESCs (Electronic Speed Controller).

With this in mind I tried fitting a capacitor, the C of the LC filter, across the input of the buck converter and the noise was eradicated.

Noise suppression capacitors and ferrite chokes are two stand ways to remove or reduce interference, other approaches include, shielding the impacted instrument or the source of interference or using twisted pair cabling among others.

I hope the above helps others achieve a quiet radio in the aircraft, but if you are unsure about what you are doing, I would suggest contacting someone that understands interference suppression techniques to help!  

Ground plane sizing for radio, transponder and PilotAware

Transponder, radio and PilotAware antenna fitting in a non-metallic skinned aircraft

There is often talk around the hangers about poor radio signals and how some aircraft can be heard from great distances while other fail to make contact with a ground station even nearby. One of the issues often overlooked is a missing or wrongly sizes ground plane. There are many myths about the purpose of a ground plane and I hope in this short article to give you guidance on the correct size and purpose of a ground plane.

Before we look at the ground plane lets set expectation on maximum distance you can be heard.

The civil air band radio is in the VHF (Very High Frequency) band and under normal weather / tropospheric conditions, it requires radio line of sight between the aircraft and the ground station; thus, the maximum range is the distances to the radio horizon from the aircraft to the ground station, for simplification we are assuming the ground station is at sea level.

The radio horizon distance is given by the formula: D= K√h

Where: D = distance in nautical miles (NM), h = height of aircraft’s antenna above ground level and K = 1.23 when h is expressed in feet

So, when we are flying at 2,000ft the maximum range to a sea level ground station is 55.00NM or at 3,000ft 67.34NM

The same is true for transponders, CAP1391 devices e.g. SkyEcho and PilotAware transmissions, however the limited power and antenna arrangement of CAP1391 and PilotAware means the range is less.

What is a ground plane is and why we need one?

Keeping this simple, it provides a ¼ wave monopole antenna (also know as a Marconi) with its required counterpart allowing the flow of the electrical current which generates the electrical and magnetic waves that make up the RF signal. The earth acts as a type of electrical “mirror,” effectively providing the other quarter wavelength making it equivalent to a vertical dipole. This in turn helps present the correct impedance to the transmitter, thus allowing the maximum power transfer into the antenna, which results in the most efficient transmission of the signal. Most antennas sold for Microlights and light aircraft are ¼ wave.

Ground plane

Does size matter?

I’m afraid the answer is yes it does! Bigger is generally better, but again there are exceptions and a minimum size for the efficient working. The minimum size is a radius of ¼ the wave length of the signal being transmitted.  In basic RF theory we were taught that bigger is better, although the benefits of size are less important above 3 times the wave length. In aviation while we are flying along we want our signal to be picked up both above and below the aircraft, the larger the ground plane the bigger the blind spot we will have on the underside of the ground plane.

Is the shape important?

No, a ground planes can be square, circular or many different shapes. Say you had a metal aeroplane, the whole fuselage is the ground plane for your radio antenna, and your transponder antenna. So long as you have at least ¼ wave length in all directions, then the shape doesn’t matter too much. However as we want the lightest ground plane we can get, a circle is the optimum shape and supports equal propagation of the signal in all directions.

What should the thickness of the ground plane be?

Any, you can use foil tape or discs of different thicknesses so long as it is mechanically robust enough and conductive.

Can it be a mesh or does it have to be solid?

It can be a mesh (the tighter the mesh the better) or even multiple radial wires, typically the more the better 8 or 16, but for our purposes a solid circle is normally the easiest and best option.

What should it be made of?

Copper, however it can be any material which is a good conductor. Aluminium is a good conductor and can be used, however you need to be mindful of the galvanic effect between a stainless-steel antenna and the ground plane. This may lead to connection issues in the future, thus I would recommend a thin copper disc.

Why do some avionics companies state to use a square ground plane?

Well I assume this is just convenience, so long as the diameter of the circle below can fit within the square it will work fine. Just make sure the antenna is in the middle!

What does all of this mean in practice?

Minimum diameter of ground planes in aviation should be:

N.B. Always round the ground plane size up not down.

Transponder: frequency 1090MHz, Wave length 275mm, ¼ wave length 68.75mm

Minimum ground plane diameter 137.5mm

Radio: lowest frequency 108MHz, Wave length 2775.85mm, ¼ wave length 693.96mm

Minimum ground plane diameter 1,387.9mm

PilotAware: external antenna fitting, frequency 869.5MHz, Wave length 344.79mm, ¼ wave length 86.19mm

Minimum ground plane diameter 172.39mm

Antenna Theory Is Complicated

Antenna theory is complicated, but if you have a ground plane with the correct minimum size and the antenna mounted in the middle this will be one less problem.  But let’s quickly prove this is fact and not just some text book exercise. As an extreme lets consider an antenna without a ground plane vs the same antenna with a correctly sized ground plane.

An external PilotAware antenna without a ground plane is put under test using a low cost VNA (Vector Network Analyser)


As can be seen opposite the resonant frequency of this antenna is not 869.5MHz as it should be! It is showing a resonant of over 1GHz. The impedance and VSWR for the antenna was also way out, in fact the reflections from the imbalance could damage the transmitter or at best the radiated signal will not be optimal.

Let’s add a make shift ground plane out of kitchen foil of the recommended size above.


opposite you can see the effect of adding the ground plane. The resonant frequency has shifted down to be close to the 869.5MHZ that we are looking for, the VSWR was down to acceptable limits and the impedance was close to 50 ohms.

Hopefully this graphically demonstrates the importance of having a correctly sized ground plane!

One last Fact! The monopole antenna was invented in 1895 by radio pioneer Guglielmo Marconi

Changing from Neuform to Kiev Propeller on an Ikarus C42A 912UL (80hp)

This is a reflection of how I went about changing the propeller, it is not meant as a “how to” and no liability will be taken for any issue others may have by following this post!

We made the decision to change the original Neuform Propeller after noticing some hairline cracks across the back of the prop. This together with an accumulation of small chips meant it was highly unlikely to pass a factory inspection, thus the prudent thing to do was to change the prop. 

Neuform Props are very good, but expensive props, so we chose to replace them with a Kiev which at the time of writing was around £1,000 less.

The first stage is to remove the top cowling, we also later removed the bottom one too, to allow us to have a good look around at the same time. This proved to be a prudent thing to do as we found our radiator bracket was broken too!

Next, remove the spinner, a tip here which some may not know, is to hold the allen key bolt and undo the nyloc nut with the spanner, else you may start to round the allen key head.

NB: I found out the hard way, that you should mark the back of the spinner plate and the flange to ensure the spinner goes back on in the correct position!

Remove top cowling
Flange Bolt

Now we need to remove the old prop by undoing the six M8 retaining bolts. These are the long ones which screw through into the flange.

After these are removed the propeller will come off still clamped in the hub.

The prop with its adaptor plate is now removed.


Removing the lugs

Now for the  “fun” part, removing the lugs from the flange.

The lugs are used by both Neuform and Warp drive props, but not by Kiev props.

These lugs are press-fit and difficult to remove. First, spray them with AC50 and then have a cup of tea while this goes to work!

The best way we found to remove them safely is to use an M8 bolt through a 17mm socket, this acts as a puller and pulls the lugs back through the flange plate without damaging or shocking the gearbox.

Once they are almost through they will easily tap out.,


Fitting the new prop


First, lay the prop out and loosely clamp the prop blades in the hub. Ensure the key marks are aligned (see image) this is just tight enough to hold it all together, while we loosely bolt the prop onto the flange using the new adaptor. Note the new adaptor plate can only be purchased from TLAC  and was around £120.00 inc VAT.


The bolts to hold the prop on are 110mm long if you purchase the correct ones. However, using these bolts means they have 25mm of thread and about 12mm of this thread is within the flange plate holes. This is not good engineering practice and after checking with the BMAA they agreed. The solution is to buy the next size up (120mm) and cut them down by 10mm thus giving 15mm of thread which means you will have about 3 threads out of the Nyloc and much less thread within the flange.

The bolts we used are M8 grade 8.8, DIN 931 120mm, cut to 110mm.

Once the prop is mounted and all the bolts are in, but not tight, they should be loose enough to allow the blades to be turned within the hub, but tight enough to stop them moving to easily.

Now the pitch can be set. We have found mounting the pitch tool 48.5cm in from the tip on the inside of the mark and setting a pitch of 25 degrees gives the correct revs, 4,800 rpm on the ground. This TLAC confirmed to be the correct test that the prop is pitched correctly. 

Work your way around all the blades in turn setting the pitch.

Carefully do the bolts up working your way around the opposite bolts that clamp the blades first.  These should be done up to a torque of 15Nm. Now before doing up the main bolts recheck, loosen and adjust and tighten as needed the pitch for each blade. 

Lastly, do up the mounting bolts that go through the flange, do this progressively working across the opposites, these are torqued up to 25Nm,  then once again check the pitch and adjust the pitch if needed.

All that is left is to ground-run the aircraft. Check your static full power rpm is 4,800 rpm +/- 50 rpm, our brakes don’t hold at this power so we check that we get this during the takeoff.

The torque of all the bolts needs to be checked at 1hr, 25hrs and 50hrs after fitting the new prop.

I hope this will help others, even if it doesn’t it will serve as a reminder to myself if I have to do a third prop conversion!

Lastly, you will need a BMAA inspector to sign your change of information form.

CHANGE OF DATA FOR A BMAA AIRCRAFT 

The little things count too when doing a preflight check!

Today we planned to fly to Le Touquet, but the weather had other ideas! As we could not fly to Le Touquet we decided to try Sandown, Isle Of Wight.

We started by cancelling the flight plans filled via Skydemon and then we set off. Initially, the cloud base was around 800ft but, soon and as indicated, this opened up and we climbed to 2,000ft and then 3,000ft as it continued to improve.

The flight down apart from the claggy start was largely uneventful. We had been having issues with our Funke TRT800 transponder, it is intermittently not being seen by ATC and locking up, however on the flight down it behaved impeccably. The only issue we had on the way down was the landing, I touched down gently and then hit a bump and a gust of wind which saw us back in the air, but not by much. Next, another gust just as we were touching down and 90 degrees to the runway saw our right wing lift. I caught this on the stick and controlled it with the aileron. I was wondering if I could have done better as I watched Colin land behind us in his C42 and saw him have the same issue, it was like watching an action replay however, this time the gust had taken him far to the left of the runway.

Approaching IoW overhead Portsmouth

The journey home, however, was much more eventful!

Funke TRT800
Tape causing the issue

First, the Transponder didn’t seem to be working, so we called Fanbourgh Information and asked for a transponder check, we tried Ident and they could not locate us, we tried another squawk but, we could not change it, so we need to send it back to Funke for a service repair.

About 40 mins from Chatteris we heard a loud ripping sound, it was like someone ripping velcro apart in our ear! followed by a humming sound! we looked at each other in disbelief, the aircraft was still flying and the controls responding normally. The humming stopped and all seemed normal so we decided to continue, and then another loud ripping sound more humming and heavy vibration through the stick and pedals!

What could this be? what should we do?

We looked for an alternative and near airfield, our best option was Old Warden so we head towards it, then as suddenly as it started, it stopped, we continued towards Old Warden with no further occurrence of the issues.

What could it be? Our best guess was that the velcro fastening between the wing and the aileron may have separated and the noise and vibration were due to the resulting airflow between them.

On to Chatteris and 10 miles out we heard Skydive One (the parachute plane) called it was taking off, wanting to get straight in we called Skydive one and advised them of our situation and they delayed the drop until we had landed. On final we put the first stage of the flap on, as the aircraft’s pitch changed the vibration and humming returned, we decided not to put the second stage on. After landing we inspected the aircraft looking closely at the ailerons and the skins, nothing! Then we spotted the windscreen tape had lifted in the middle of the vertical section, could this have been the issue? it would make sense re the ripping sound, but what about the humming and vibrations? we reasoned that the humming could also be due to this and possible the vibrations too if it was disturbing the airflow. The tape was removed and we took her up for a test flight and to our surprise, the issue was solved!

This reminded me of Rob Mott’s article in Microlight flying magazine where he talks about knowing your aircraft and not to panic if you have an issue. We knew the aircraft was still flying, we knew it was responding normally to all control inputs so we minimised the issue by flying conservatively and landing at Chatteris as soon as possible.

Little things like the edge of the tape lifting are important to check on a pre-flight check as well as the major items!. 

Should we have performed a precautionary landing?

We could have put her down in a field or at Old Warden, but she seemed to be flying OK and what damage might have been done during the landing? Old Warden is PPR and was NOTAM’d for model flying.

There has been some discussion if we were right to have continued flying or not. What is your view?

ROCC – AGCS training is FAB

This weekend my friend Simon and I attended  ROCC (Radio Operators Certificate of Competence) training which following a Written and practical exam and approximately 2 days on the job training enables you to operate an Air-Ground Radio station. I don’t have a great desire to provide this service from where I fly from, but I thought it sounded interesting and would serve as a useful RT refresher. When I first saw it advertised on a Facebook Group (see sometimes good things come from FB!) the chap advertising it was offering a familiarisation of ATC including a tour of Humberside’s ATC unit. I responded to Lee Stephenson’s ad and found him to be professional, communicative and helpful the course was also offered at what I thought was a good rate, £150.00 including the exams, so I booked up two places. Lee operates as LAS Aviation Services.

As I had been teaching during the day Simon kindly offered to drive us up to Humberside airport on Saturday evening; Lee had kindly included car parking in the training cost.

On arrival, we were both hungry and so we went from the car park to the hotel (Hampton by Hilton) stopping only to look at Thunderbird 3, yes you read that correctly! Eastern Airways code is T3, so at some point in time the owner has purchased a scale replica of Thunderbird 3 (T3). This became more of an interest for me as I casually snapped a picture and put it on Twitter which has at the time of writing 458 likes and 295 retweets, more than any of my other tweets, odd how some things just take off! 🙂


T£ Tweeter

The lady on reception had recently started work at the hotel, she had previously worked for the now-closed bar restaurant next door, I bet you know where I’m going with this. Around 40% of the hotel’s bar menu was unavailable, so burger and chips it was! later that evening when she was pouring me another G&T from an almost empty bottle, she said “Queens!”, I was taken by surprise by this! She explained if you call “Queens” when a bar person is pouring you a drink from an almost empty bottle they have to pour the remainder into your glass at no extra cost. Well, I had learned something new and beneficial before the training had even started.

Sunday morning, Simon and I walked over to the information desk in the terminal and we announced our arrival. Shortly after a young guy (you reach an age when everyone is a young person!) wandered over and introduced himself as Lee, he signed us in and took us up to the training room where he had tea, coffee, biscuits etc waiting for us. A little later the other two people attending the training arrived, Alistair and Danny (who is also a blogger, check out his blog here), we all got on well and with Lee too which made for a fun day.


The Gang
The Gang!

ROCC AGCS Training


Lee mid flow

Lee started the day with a recap of the appropriate parts of CAP 413 and CAP 452 (ROCC). He commenced with the abbreviations (phonetic alphabet, numbers etc) and some definitions and when to use them; such as “Confirm” to request verification of Clearances, instructions, actions and information. We continued to run through the basics of the Readability Scale, Transmitting Technique and Time.

After a break, we went on to Aeronautical station callsigns and the type of service provided by each e.g. Tower means they provide an ATC service, Radio an AGCS… Now it was time for some theory, luckily for me I had covered this before when doing an amateur radio exam, this is not as bad as it may sound to some! VHF Propagation and interference, VHF under normal atmospheric conditions travels in a line of sight. To calculate it you use the following formula D = 1.23 √h where D is the distance in Nautical Miles, h is the height in feet above the ground. So for 3,000ft, the transmission will travel 67.3 nm.

Next, we covered QFE, QNH and QNE followed by Aircraft call sign abbreviations, when and how to abbreviate them, category of messages and their priorities, Unit of measurement, emergencies and how to handle them as an AGCS station, the role of D&D and their location.

After all of the above we moved on to  RT, when and what an AGCS can say and many examples were given, we covered relaying clearances, aircraft and vehicle messages and examples of handling an emergency call on frequency.

Lee provided lunch which put to shame the many courses I have been on with other much larger companies.


After lunch, it was exam time!
There is a 1hr, 24 question exam, unlike most other aviation exams this is written answers, not multiple guess, sorry choice. I found this very concerning being dyslexic, but it was not as bad as I had feared.

We then watched a video and had to pick up as many mistakes as we could, which was good practice for the last part of the ROCC, the practical exam.

Lee asked who wanted to go first and as I just wanted to get it over and done with I volunteered!

In a room on our own Lee explained how it would be run and checked I was clear on this. To be honest, at this point I was quite nervous, Lee read out a long message and I for the life of me could not write it down in time. Remembering my radio FRTOL training I decided to ask him to repeat the message and to speak slower, It worked and was permissible too. It was then just a case of remembering what we had done and what you hear most of the time when flying. All went well as Lee worked his way through about 5 different scenarios from an aircraft joining a circuit with other traffic, a fire truck crossing, relaying a clearance and checking the read back and lastly handling an emergency.

Yay, I passed and so did everyone else on the training course too, happy days!

ATC Radar and Tower Visit

We now headed over to the control tower and spent some time in both the radar unit and the tower, which was very interesting and we were made to feel very welcome, it transpires that controllers are normal people just like you and I, furthermore that they would prefer you talk to them and get the radio wrong than not to talk to them at all, this is something the Norwich ATC had said to Simon and I in the past too.

Radar


Tower


As we all got on so well we are all planning to fly into Humberside in a few weeks time for a mini-reunion!

In summary, a worthwhile day, where we refreshed our radio calls, gained the ROCC qualification, had an awesome time looking around the ATC Radar and Tower and made some new friends as well!

I also believe that the ROCC may count towards my BMAA Gold Wings award, bonus!

Get Your Wings gets it’s BMAA Bronze and Silver Wings!

At the last (and my first) instructors seminar (Feb 2019) Rob Mott from the BMAA presented a scheme called “Wings“. It has various levels Bronze through to Diamond, each level becomes progressively harder to achieve, thus challenging the pilot to further their skills in a number areas Safety, Flying Skills, Education and Navigation (flying to a predetermined route). To be honest, at the time of presentation of the programme I didn’t think I would have the time or the inclination to embark upon the programme. One wet non-flyable day I took a look at the scheme and decided I had the required training within the 24 month prior period, so as I only needed to do the flying I decided to go for my Bronze, thus if anyone at my club or through my blog or twitter account asks about the scheme I would have first-hand experience of the scheme.

The Bronze award requires one safety item, for me this was the BMAA first Aid training which I did a while ago and would highly recommend this life skill to everyone, and a cross country nav with one land away and one waypoint on each leg, total distance needs to be over 100NM, each waypoint needs to be 20NM or more from the point of departure. Come the day it was very blustery but, within limits, the conditions were challenging. To make it more interesting I thought I would throw in a zone transit as in my normal flying and instructing I don’t get to do many of these so it was a good opportunity to practice. All went to plan and thanks to Norwich ATC I got my zone transit which meant I would keep well to time. Document completed before the flight and filled in during flight, times totaled and the fuel estimate compared, I was within limits (+-20%) so I emailed the paperwork into the BMAA.

It taught me that my fuel estimate was under, not by much just 2lt but I was expecting it to be over, (I blame the headwind and having to increase my speed to meet the plan!) I now allow a little more than before, a valuable lesson learned. I also enjoyed planning and flying to the plan. So I thought I would give my Silver Award ago too. I was surprised just how accurate I was on this as it was double the mileage (200NM) and two land aways. I was very pleased with a 99% accuracy on my fuel this time and the fact it was 1lt over, much better than being under as I was for my Bronze!

I may go for my Gold but, with the cost of the extra training and the time to fly it, that may have to wait.

I really enjoyed doing the Bronze and the Silver award and have just two things I will be feeding back to the BMAA, the first is I think it would be good to be made to list and plan fuel for at least one alternative airfield and the second point would be on the Silver and above maybe the provision on the form for two or more waypoints.

I would recommend following the scheme to all but, especially new pilots.

Some pictures from my Silver award flight below:


North Cotes

Humber Bridge

Scunthorpe

A very busy day at Turweston

A visit to Turweston

I had been meaning to take my daughter flying again for sometime, but with instructing and inspecting, time has been scarce!


Today was the day, but the wind was forecast to be gusting 15kts and 90 degrees across the runway, bang on the limit of the C42. However  as I needed to practice my crosswind landings I decided to go, after all I could always go-around if I didn’t like it and have another go before giving up and bugging out!


At Chatteris I PPR’d (Called for permission to land, Prior Permission Required), this was granted, then the guy said to keep a good lookout as they have two different fly-ins happening today,  I normally prefer a quiet destination.

The person who had our aircraft before me was late back, not his fault as he got caught by a couple of parachute drops, a hazard of flying from Chatteris.


The flight over was without event, PilotAware and SkyDemon were on top form and helped me keep the good lookout requested, which is also normal practice.

I joined downwind with other aircraft Joining crosswind, overhead, downwind and long final, this was going to be “fun”.


Silverstone Race track is adjacent to the downwind join for 09

As it happens the circuit was uneventful. I was high on final and with very little headwind I had to side slip to get down.

I must have had someone faster behind, as I heard them call going around as I was rounding out. This always use to worry me, but you just need to focus on flying and landing your aircraft. They are behind so its up to them to provide the appropriate separation and if they don’t or can’t its their fault not yours.


Santa Pod Drag strip on-route

On my three visits to Turweston I have always found the guys in the tower and on the radio to be excellent and very welcoming, as were the marshals and restaurant staff today. It has been a pleasure to fly there each time and I will be back for some more cake in the future!

On our return we had a Chipmunk push in front of us as we were waiting to go in the warm up area, but that’s fine  he was burning a lot more fuel then us!

On-in-all a very enjoyable day spent with my daughter #FatherDaughterTime!